LED EDUCATION CENTER
We've made it our mission to equip our dealers with the best information on the technology, application, and substantial benefits of LED signs. Find out how we set ourselves apart through our continuous education programs.
Components
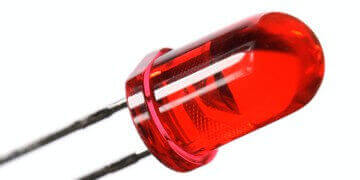
LED
A light-emitting diode (LED) is a semiconductor device that illuminates when electricity passes through it. LEDs do not contain filaments like regular light bulbs, and they do not have delicate parts that break or burn out over time. Industry standard LEDs are rated at 100,000 (11+ years) of constant use.
The Stewart Difference
We only use the highest quality LEDs that meet stringent guidelines for output and lifespan.
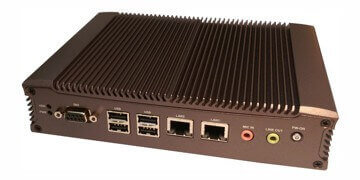
Controller
A controller is the "brain" of the LED display. This may be a purpose-built PCB board with only enough components to display a simple message, all the way to a powerful industrial PC (IPC) capable of an enormous range of features.
The Stewart Difference
Our Aurora and Polaris LED displays include powerful and rugged IPCs for maximum performance
and longevity.
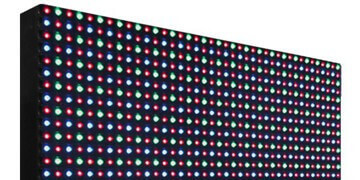
LED Module
An LED module is a board that contains several rows and columns of pixels, as well as the circuitry and other electronics to power and control them. These modules are then configured edge-to-edge on a frame to form an LED display.
The Stewart Difference
Most of our modules are a standard 320mm x 320mm square and can be upgraded, along with the power supplies,
to a different type of module at a later time.
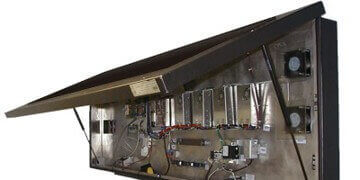
LED Cabinet
The LED cabinet is the metal enclosure that contains all of the LED display components. This critical structure protects the sensitive electronics inside from weather intrusion, debris and vandalism.
The Stewart Difference
Our all aluminum cabinets are UL Listed
or ETL Listed for safety and quality assurance. An exterior paint finish provides chip, impact and fade resistance.
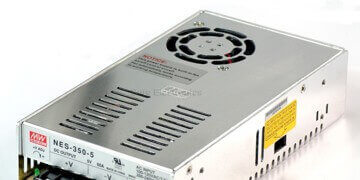
Power Supply
A device that converts incoming AC power to the correct voltage DC power, and distributes it to electronic components. Several power supplies are typically required per LED display, with the number dependent on the size of the display.
The Stewart Difference
We use only Mean Well brand units; the industry leader in high quality power supplies.
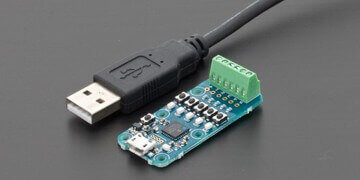
Light Sensor
A device that detects the ambient light levels around the LED display, and adjust the display's brightness accordingly. This prevents the sign from being too dim in the daytime, and too bright at night.
The Stewart Difference
All of our light sensors undergo thorough testing at third-party facilities.
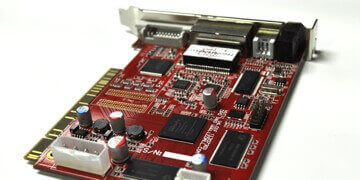
Sender Card
A device that takes input from the controller, typically from an HDMI or DVI input, and converts it into a signal that is sent to the receiver cards that make up a portion of the display. There is typically a single sender card per independent side.
The Stewart Difference
All of our sender cards undergo thorough testing at third-party facilities.
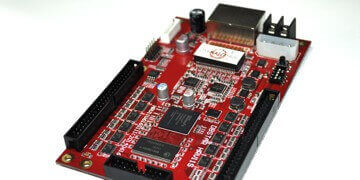
Receiver Card
A device that takes input from a sender card, typically an Ethernet input, and converts it into a signal that is sent to the LED modules that make up a portion of the display. There are typically multiple receiver cards per independent side, with the number dependent on the size of the display.
The Stewart Difference
All of our receiver cards undergo thorough testing at third-party facilities.
Definitions
LED Display
A LED display is a variable message center utilizing Light Emitting Diode Technology, LED displays can be single or double-sided, single color or full color, and come in many sizes.Pixel
A pixel is a point of light. An LED display is made up of an array of pixels, multiple points of light appearing as dots. These pixels light up in different combinations, forming text, images and video clips on the display. A pixel can be as small as one LED or it may contain a cluster of LEDs that act as a unit.Pixel Pitch
The pixel pitch or center-to-center measurement is the distance from the center of one pixel to the center of the adjacent pixel. Pixel pitch is typically measured in millimeters, such as 10mm, 16mm or 20mm.Matrix
The matrix of a sign is the number of pixels vertically by the number of pixels horizontally. For example, if a sign has a matrix of 32x96, this means it has 32 pixels from top to bottom and 96 pixels from left to right. A larger matrix allows more text and more of a graphic to appear on the display at the same time. The matrix may also be referred to as the resolution of the display.Millicandela (MCD)
A millicandela is a unit of measurement for the brightness of a single LED. A millicandela is equal to 1/1000 of a candela, which is comparable to a single candle's brightness.Nit
A nit is a unit of measurement for the brightness over one square meter of a display. This value takes into account the number of LEDs per pixel, pixel pitch and millicandelas. Your sign's nit rating can help you determine which sign is a better value when comparing products and companies.Viewing Angle & Viewing Cone
The viewing angle is the maximum angle that text and images can be seen on a display. A narrow viewing angle causes the text or image to "disappear" from the display as a viewer moves away from a position directly in front of the sign. The viewing cone is simply double the amount of the viewing angle.Master/Master and Master/Slave Configuration
On a two sided display, the sides can be configured to operate independently or together. In a master/master configuration, the two sides can either show the same message or can show different messages at the same time. In a master/slave configuration, one side always sends a signal to the other; resulting in the same message on both sides.Full Color
A full color display uses a combination of red, green and blue LED light to create any color. Combined with the overall intensity of the full pixel, an enormous range of colors are possible. Our full color displays are capable of showing 281 quintillion different color combinations.Grayscale
A grayscale display only shows shades of a certain color, usually red. Our grayscale displays show 4,096 shades, far exceeding the industry average. With two LEDs per pixel for most modules, our grayscale displays are typically brighter as well.Why Does Brightness Matter?
There are two important things to consider related to sign brightness: how well and how long it will compete with the sun. Our LEDs are among the brightest available to provide you with a sign that will be visible 24 hours a day for years into the future.
How well a sign competes with the sun.
Ensuring that your sign is readable during the day is vital to the success of having passers by read your sign. The brighter the display, the better able it is to compete with the sun.
How long a sign competes with the sun.
LEDs do not burn out, however they do grow dimmer with use. The closer an LED gets to 1500MCD, the less effective it is at competing with the sun. Starting with a brighter display ensures that your investment will be readable for many years into the future.
How to Choose a Size
One of the most important decisions when purchasing an LED Electronic Message Center (EMC) is determining the appropriate resolution (pixel pitch) and physical size.
These are influenced by several factors including how the sign will be used, where it will be placed, distance to the audience and the speed of the audience to name a few. Please speak with your authorized Stewart dealer partner to better understand which display is suitable for your application. The recommended minimum and maximum viewing distances of an EMC are based on two characteristics of the display: The pixel pitch and the display's physical size.
LED EMC Display Recommended Viewing Distances
Use these calculations to help you select the best size and pixel pitch for your specific location.
Minimum
Pixel Pitch is the distance from the center of one pixel to the center of the adjacent pixel. An EMC's minimum viewing distance is driven by this measurement. If the EMC is viewed at a distance closer than the "Minimum", messages will still be readable, but will appear pixelated.
- 10mm Pixel Pitch = 10 Meters (~33 ft)
- 16mm Pixel Pitch = 16 Meters (~52 ft)
- 20mm Pixel Pitch = 20 Meters (~65 ft)
Maximum
The practical maximum distance a sign can be seen from is 10 times the sign's square footage. Any viewing distance greater than this calculation will decrease the readability of the sign and its ability to attract attention.
For example:
4' x 6' sign = 24 square feet so 24 x 10 = 240 feet
Sizes and comparison videos are available for our Aurora and Polaris LED signs.
Optimizing LED Graphics
LED signs are amazing pieces of technology. They are capable of showing text, images, animations and video visible from far away and under harsh outdoor conditions. Despite this, all LEDs have limits when it comes to the amount of detail they can display.
The reason for this limitation has to do with the number of pixels, or points of light, that make up the display. Each pixel is controlled as either on or off - and in some LED signs, each pixel can produce different levels of light output. The difference in light output is what creates a three dimensional image on the display itself. Text messages transmitted directly onto a sign are typically using pixels that are either on or off to make up each character in the message itself.
Pixels are arranged in rows that go across the length of the display, and columns that go up/down the height of the display. This forms the pixel matrix, typically written as height by width. For example, a 32x128 pixel display is 32 pixels high and 128 pixels wide, for a total of 4096 pixels.
Commonly, only display height in pixels is used for comparison purposes. This is because the height is typically smaller than the width, and is therefore more of a deciding factor for display capabilities. LEDs are typically presented longer rather than taller so that the user has the option to include text messages from left to right on the display.
A typical LED display may be between 32 and 96 pixels in height. In comparison, high definition TV is 1080 pixels high and a 5 mega-pixel image is 1920 pixels high.
Clearly, this amount of detail cannot be replicated on an LED display. So how does someone take their own image or video and make it look good on their sign? The answer is to find an optimal way to change its size to fit the display. When it comes to placing an image or video onto an LED display, there are three ways to make it fit:
- Resizing (shrinking the image or video to fit on the display)
- Cropping (selecting only a portion of the image or video to be displayed)
- A combination of the two
We will be using this example image that is currently 250 pixels high by 400 pixels wide. It is in color, but the following instructions also apply to red or amber displays. They also apply equally to video as well as images.

Resizing
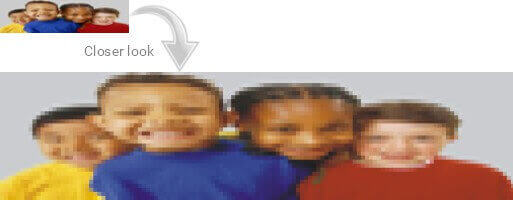
The least desirable way to put an image or video on your display is to simply resize it. In essence, you are combining many pixels into one, resulting in a loss of detail. The larger the original image, the more pixels that need to be combined to fit onto the available LED matrix. Here we see our example image (which is 250 pixels high by 400 pixels wide) resized for a 32x128 display matrix.
You will notice two differences from the original image. The first is that the image is now pixilated, meaning that the individual pixels that make up the image are now visible. Pixilation is unavoidable on an LED display due to the limited number of pixels available. However the gradation, or difference in color between adjacent pixels, plays a large part in making the image look good. We will see this in the next example.
The second difference is that the aspect ratio of the image has changed, making the image look "stretched". This is because the height had to be reduced almost twice as much as the width to make the original image fit into 32 by 128 pixels.
Cropping
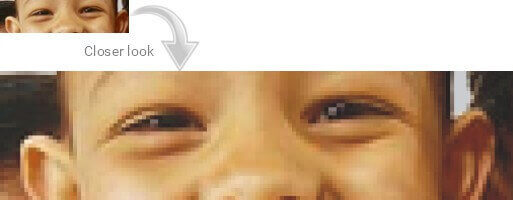
A more acceptable way of fitting an image to a display is to crop it. This simply means selecting a 32x128 pixel area in our original image and removing the rest. Here we see our example image cropped to 32x128.
The negative to this approach is that only a very small area of the original image could be used. However, you will notice that the image still maintains its original aspect ratio (it doesn't look "stretched" or "scrunched"), and that the smooth gradation makes the image look much better. Try viewing the large examples at a distance to see the difference.
Resizing and Cropping
The best approach is to find a middle ground that gives us some of the benefits of both. This is done by resizing the image first (to something larger than the display and without changing the original aspect ratio) and then cropping, or by performing both simultaneously. Here we see our example image that has been both resized and cropped.
Here we have resized the image to include more of the subject, but have also cropped to reduce the amount of detail. The result is an image that will look good on the display.

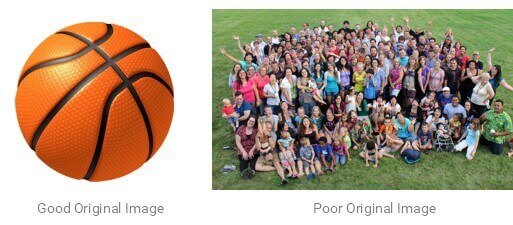
Choosing the Right Image or Video
While these tips can be used for any image or video, starting with the right one can make things much easier. Choose subjects that do not contain a lot of detail and have a smooth gradation of shades or color.
Images or video that start with a high amount of detail will have many adjacent pixels combined into one, resulting in a loss of clarity of the original subject.
More Information
As a Stewart Signs Wholesale dealer, you will have access to dozens of industry whitepapers that give further insight into this evolving technology.